Pages

Highlight Of Last Week

Search This Website

Tuesday, December 15, 2020

Apply PAN Card Online: How to Apply PAN Card Online Using TIN-NSDL

 PAN stands for Permanent Account Number and is a unique identification number issued by the Income Tax department of India to identify every taxpayer in the country. Your PAN holds all your tax-related information in one place, and as your PAN card links all your financial transactions to you, it allows the Income Tax Department to maintain a detailed record of all the same. Therefore, the system helps thwart tax evasion extensively.


PAN is not only a card necessary to file IT returns, but you also need it for several other reasons such as in order to open a bank account, when applying for a debit/credit card, when applying for loans, when starting an FD, and for insurance payments. You can use it as a proof of identity and you have to mandatorily furnish it when initiating a foreign currency exchange. Moreover, submitting a copy of your PAN card is essential when you’re buying/selling vehicles, property, and even when you’re purchasing jewellery.

If you are wondering how to make PAN card, you can do so easily by submitting your application to TIN-FC or an NSDL PAN centre. NSDL also accepts applications online and has a step-wise procedure on how to apply PAN card online. Whether you want to know how to apply for new PAN card or wish to correct your existing one, TIN-NSDL enables you to do so conveniently from the comfort of your home.

How to Apply for a PAN card Online?
The process of how to apply for a PAN card online is very simple. All you have to do is follow the below-mentioned simple steps and fill in the necessary details and upload documents on the official website of TIN-NSDL. Once you complete the steps, the physical copy of your PAN card will be delivered to you within 15 days. Here is the stepwise procedure on how to get a PAN card online.

Step 1: Go to the official website of TIN-NSDL and navigate to the PAN section under ‘Services’ to apply online. Optionally, click on this link to do so:

How to apply PAN card online using TIN-NSDL
Here, fill in the details like application type (Form 49A for Indian citizens), category (individual), title (Shri/Smt/Kumari), your name, date of birth, and contact details. Enter the CAPTCHA code and click on the ‘Submit’ button. Note the token number generated, and proceed with PAN application.

Step 2: You will now be redirected to a page where you will have three options using which you need to submit the documents for your PAN card application. Here you can either submit the documents digitally using e-KYC and e-sign, submit scanned images via e-sign or forward documents physically. Once you decide on the document submission process, fill in the details in the form after reading the instructions carefully and then click on the ‘Next’ button.

Step 3: At the next step you will have to fill in the details related to your source of income, address, as well as your contact information. You have the facility of saving the information at this stage by clicking on ‘Save Draft’.

Step 4: This step requires you to enter your AO (Assessing Officer) details to assess the tax jurisdiction you qualify for. You will find this information on the same page. After filling the details, click on ‘Next’.

Step 5: Finally, enter information about the documents you have submitted as proof of your identity, address, and date of birth. You will also be asked to upload your photograph and signature. Do this and click on the ‘Submit’ button.

Self-declaration details to apply for pan card online
After submitting the application and making the payment, you will get an OTP on your mobile number linked to your Aadhaar. Upon entering the OTP, print the receipt with the 15-digit acknowledgment number. Sign this receipt and send it to the NSDL office via courier or post within 15 days from the application date. Subscribe the envelope with ‘APPLICATION FOR PAN-N- (15-digit acknowledgement number)’.
Read More »

Monday, December 14, 2020

Live Video Chat with Girls – Talk to Strangers Online Dating App

 Start Chat with Crush Online in your nearby strangers. Best Random Live Video Chat with stranger male & female. Unlimited chatting and calling at all around the World. Just create your profile with basic details such as Profile Photo, Name, Gender, City, State or Country.


Check other user profile and if you like then send Hello message to start the chat. Make chat more interesting by sending gifts to your beloved. Best app for singles to have Video Call and Chat with strangers. Girls and Boys talk to strangers of your kinda people.


Live Video Chat and call stranger app for all age people. Matched with someone of your interest strangers to meet new people in life. Find nearby friends and start video chatting with your crush on just one click. Text chatting with your girl friend and boy friend is for expressing love.


App for Limitless Chatting with your Crush at anytime. Meet nearby singles friends to find your love crush. One can have face to face video calling to see girlfriend and boyfriend face online. Discover new friends and start unlimited chit chat. Random video chat with strangers is all around the World.


You can search your friends and also see new users. Secret Video Chat with friends at day and night. If you bored of your busy life then start Chat with Girls to have fun and make it exciting. Send instant messages to your loved ones and also keep it private.


Anonymous video chat app iPhone for singles to get mingle. Chat and send pictures to strangers of various types. Meet Random People of your interest and start new relationships. Purchase coins and buy gifts of your choice to send gifts in live chat video.


This app has amazing features to send gifts to your loved crush. Sending Gift such as I Love You, Rose, Hearts, Teddy, House, Dress, Food and many more related to your talk. Anonymous Live Video Call with Girls and Boys of your preference people. Talk to female strangers online in your nearby places.


One can have private video call with online strangers. Chat with Live users around you with singles to pair up. You can have voice chat and text chat by sending gifts pictures. Hook up with your crush around you and start new relationship goals. Send a gift to your crush girl and boy through this app.


Start dating singles near me with beautiful girls and handsome boys. Everyday conversations chat with your crush worldwide. Online Dating App for attractive singles ladies & man nearby you is for meeting new peoples. Free Random Chat and Call with online strangers.


Send gift to crush to make His or Her special. Video call with unknown peoples in nearby your area. Find your love match with this best app for boys and girls. User can have chat with new people near you and also around the world. Easily have chat and call with unknown strangers to make your Crush.

Read More »

How to Impress a Girl: Follow these sure shot ways to get success

 The best way to impress a girl is to pay her a sincere compliment. Everyone wants to impress beautiful girls. However, the job is not so easy. One cannot know how a girl feels. However, one can impress her by making him seem more desirable to her. And by this, he may make her fall in love with him.


The best suggestion to impress a girl is to become the guy who will take care of her and will consider all her needs and desires. That’s all you really need to impress her.


Although some guys feel so, the muscles or physical features can’t do it. Only care, kindness, compassion and responsibility can.


Many people think that giving gifts is the best way to impress a girl. But that is not the whole story. There are other better ways to win a girl’s heart and make her fall in love. It’s not just about giving chocolates and roses to woo a girl – it’s all about keeping her truly happy and complete.


It is said, women remain as mysterious as the outer realms of the Solar System. Yet, these tips may help you impress a girl:


1. Respect her


Being respectful is one of the top attributes girls look for a guy. If there is love, there ought to be respect. So, as much as possible, respect her feelings, decisions, her life, and in return, she will respect you even more.


2. Do something she likes


You probably hate going on a shopping with your girlfriend, listening to her favorite music, or watching movies she likes, but try to put up with at least for few hours. You should learn to compromise to build up a fulfilling relationship. Let her choose the movie you’re going to watch together, music she likes, or accompany her when she go on a shopping. At times just let her play the main role and pretend to like it, or at least don’t hate it, maybe you will find out something new and nice.


3. Make her laugh


The old saying is true; girls do love guys with a sense of humor. So try making her laugh often even if you are not that good in this. Tease her nicely, be playful, tell her jokes, make use of your body language, just be yourself, and don’t pressure yourself.


4. Pay her a sincere compliment


A nice and genuine compliment is a big way to impress a girl. Think of what you like the best about her. It could be her smile, her laugh or her intelligence. However, there is a limitation in complimenting. You should not compliment her on any physical traits except her eyes or her smile. Keep it short and sweets. Pay attention to how you word it. Instead of saying “That’s a pretty dress” or “I like your outfit,” say “You look really great in that dress. Smile! Keep eye contact while you say it, too.


5.Make her feel special


Find little ways to let the girl know that you think she’s an extraordinary person. You will see that this way will definitely earn her notice. Don’t ignore her or play hard to get. If she texts you, text back. If she wants to talk, try to make the time even if it’s slightly inconvenient. Don’t focus the discussion on you when you are talking to a girl. Girls are way more comfortable when they talk about common interests. Ask about her interests, hobbies, favorite books, music, etc. If she asks you a question, answer it in a few, short sentences and then redirect the question back at her. This engages her in the conversation. Start an inside joke with her! By doing this the two of you will share a secret connection that is shared between only the two of you. This will make her feel special, included and closer to you. It will also give you an easy-to-come-up-with conversation starter.

Read More »

Google assistant

 What is Google Assistant?

There was a time when we used to see voice based artificial intelligence only in English films. When this will be really for use, it was beyond our imagination. But see today technology has become so advanced among us that now we use many Artificial Intelligence in our homes like Alexa, Siri and Google Assistant. We are at a time when we can listen to news using AI, play a video, get knowledge about the weather, send a text message to someone and so on. Can only be done with voice commands.

We should thank Google’s Google Assistant for all these. Because today you can enjoy every Android User Android Assistant only because of that. According to an Android user, what could be bigger than this, that only by your voice commands can the Google Assistant work like your assistant. Google’s AI has made itself very advanced so that it can easily intergrate with all our devices. Apart from this, now it has become a part of our daily life.

Google Assistant is a voice-controlled smart assistant. If seen, this is basically an extension of Google Now – which is designed for personal use. This is an expansion of Google’s existing “OK Google” voice controls.

If we talk about its first version which was Google Now, it used to first collect all the relevant information of the users for them. Like what they like, where they live, where they work, what are their travel plans, etc. Whatever you had never found in the google search engine, they used to save it in their database. But Google has discontinued its Google Now Brand. But at the same time, his assistant has not been finished yet, instead he has been made even better, like many personalized elements have been fused in it. Together, a wide-range voice control is used to operate it.

Google Assistant supports both Text and Voice to operate. Along with this it provides flexibility to users by having an easy conversation with them and fulfills all their needs that they can. In truth, it is actually more than a personal assisant.

What can you do google assistant

“OK Google” or “Hey, Google” are used to initiate the operation of the Google Assistant on the basis of voice commands, voice searching, and voice-activated device control, allowing a user to perform many tasks such as: Sending messages, checking appointments, searching for a song online play, etc. Just like Apple’s Siri (Personal Assistant) works on an iPhone or iPad, just like Google Assistant can provide you with a bot-centric AI experience, it is specially designed to give you a conversational interactions. can do.

  • It can control your devices and smart home.
  • Can access your Calenders and other personal information.
  • You can search for online information, such as restaurant bookings, directions, weather and news.
  • Can control your music.
  • Content can play in your Chromecast or other compatible devices.
  • Timers and reminders can run.
  • Can book appointments for you and can also send messages.
  • Can open the phone’s apps.
  • Can read notifications for you.
Read More »

Trueceller application

 Truecaller is a widely used mobile app across the world that finds the details of a given phone number globally from its database of user profiles and their synced phonebook contacts, integrated together as virtual phonebook. One can also find the contact details of a person by his name and other details, if he is a Truecaller user provided that he keeps his profile and contact details public.

Other than finding phone number details and profiles, Truecaller has many other functionalities. Truecaller can also be used to block spam calls and SMS. It also launched UPI payments and recharges where one can send and receive money on the Truecaller mobile app itself.

For all these functionalities and features, people are using Truecaller globally and it has more than 250 million users worldwide and more than 100 million users in India. With these things, one can see that Truecaller is a great channel for businesses and brands to reach their target audience on mobile and promote their marketing messages.

That’s the idea behind Truecaller, a smartphone caller ID app. With Truecaller, when a telemarketer calls you, you’ll be warned before you pick up the phone that it’s a spam call so long as one of the app’s 40 million users have already reported it as such. It’ll also give you info on legit callers, too. And, of course, there is a block feature. 

Read More »

Sunday, December 13, 2020

HOW TO GET CALL DETAILS OF ANY NUMBER

 Take one year call details in one click. How to get call history in one click: Friends in this article we will tell you that you can save your mobile phone contacts, call log, history in PDF in 1 minute on your mobile.    Can create a backup file of that.

 1- Install E2PDF - Backup Restore SMS, Call, Contact, TrueCaller app from Google playstore.

 2-see above, a page like this will open in front of you.  PDF Backup is showing you.  Click on Click to continue below that.

 3- In the above photo you see many options like sms, general call log, contacts.  Click on the thing you want to backup.  If you click on sms then all 1 sms of your 1 year will be backed up.  Similarly, you can easily make 1 year backup of your call log and contacts.  Now I will show you how to backup.  I click on sms.

 4-In the photo above, you can see the sms that have come on my phone during the last one year.  Now scroll down and go down.

 5- In the photo above, you can see that the option to Export to PDF is visible.  Write sms on it.  Now click on Export to PDF.  Sometime your back up will be complete.

 6-Now open My Files.  Then click on Internal Storage.

 7- Friends, I installed E2PDF - Backup Restore SMS, Call, Contact, TrueCaller app.  So our backup file will also be named as E2PDF.  In the photo above, you can see the file named E2PDF - Backup Restore inside Internal Storage.  Click on it

 8- In the above photo you can see that the backup of sms of last 1 year has been made as PDF file, click on it

 9- In the above photo you can see that the backup of all sms of last 1 year has been saved in my phone in PDF file.  In this way, friends, you can also save your phone contact / call people / SMS.

 DOWNLOAD

Read More »

Saturday, December 12, 2020

WhatsApp tips and tricks: How to disable blue ticks and hide last seen on WhatsApp

 We might love the popular instant messaging platform, WhatsApp for all the features it has to offer, but the blue tick marks and last seen notification is not preferred by everyone.

To the dismay of its users, WhatsApp introduced the 'read receipts' (Blue ticks) option in its app to display checkmarks next to each message you send. The feature lets people see precisely when the message is read. It works in a simple way. When the grey checkmarks turn blue that means the receiver has read your message but when the tickmarks remain grey - it just means that the message has only been delivered. 

Earlier, WhatsApp users could only see when the message was delivered but since the inception of the read receipts option, they get to know when you are ignoring them by not replying to their messages (you have already read). And that's when the problem arises.

Although it helps you in comprehending when a person -- you are sending texts to -- even after reading your messages is not replying, it brings you in trouble when you are the one not replying to someone else's messages. 

Apart from the 'read receipts' option, the 'last seen' notification on WhatsApp, similarly, is one of the features that give you no privacy. It let all your contacts know when you were last online and when their message reached you. With this feature, your contacts get permission to see and check when you were active on the app. 

We might love the popular instant messaging platform owned by Facebook for all the features it has to offer, but the blue tick marks and last seen notification is not preferred by everyone. 

Luckily, WhatsApp has an option to disable both these features and there are simple ways to avoid letting others know when you are reading their messages or when you were last online on the app. Here's a quick guide to help you keep your privacy on WhatsApp intact. 

How to disable blue ticks and hide last seen on WhatsApp

Before getting relieved of the annoying Blue ticks aka read receipts option, you must know that after disabling the read receipts you will no longer be able to see when the receiver read your message, in the same way, they will not be able to see when you read their message.


Likewise, once you disable the last seen option on WhatsApp, you too will not be able to check when your contacts were last online. So, if you have made up your mind then follow these five simple steps to disable blue ticks and hide last seen on WhatsApp.


STEP 1 : Open WhatsApp

Open the app on your smartphone to disable the option

STEP 2 : Tap on three dots

On the top right corner of the app, you will find three vertical dots. 

STEP 3 : Head to Settings

Now go to the 'Settings option and tap on the 'Account' then click on 'Privacy' 

STEP 4 : Disable Read receipts

A list of options will be displayed on the screen (like in the picture given below). Now uncheck the 'read receipts' option which will turn its button from green to grey. 

STEP 5 : Disable Last seen

Now tap on the last seen option and according to your preference click on any of three options - Everyone, My Contacts or Nobody

Read More »

All about the Aadhaar card update process

 Aadhaar is the largest biometric identification system in the world, where individuals are provided with a unique 12-digit number which is linked to their biometrics. It would not be an exaggeration to say that in future Aadhaar would become mandatory for availing the benefits of government schemes. 

Aadhar card serves as proof of address and identity as well. It is therefore essential that all your details and information in the Aadhaar card are accurate. Otherwise, you might not be able to receive the benefits of government schemes. If there have been any changes in your information or biometrics, you must go for an Aadhar Card Update immediately.

1. When do you need to go for an UIDAI Aadhaar Update?

There can be some situations that can require you to apply for Aadhaar card correction. Some of the most common scenarios being: –

  • Change in your contact details (mobile number or address)
  • Change in your name (after marriage or willingly)
  • Clerical errors by the operator during the enrolment process
  • Change in Biometrics due to an accident (Fingerprint, Iris)
  • Change in the local language
  • Quality of biometrics captured during enrolment not being up to the mark.
  • Updating Aadhaar card with the age of a child (at the age of 5 years and 15 years)
  • The demand for additional documents by UIDAI
  • In case of multiple authentication failures

2. Documents required for an Aadhaar Card Update

The documents required for updating your Aadhar data vary according to the nature of the change required. The detailed list of documents could be checked at the official portal of UIDAI or by clicking on the following link: –

https://resident.uidai.gov.in/Resident-theme/pdf/valid_documents_list.pdf

3. Aadhaar Card Update Process

The Aadhaar card update process can be completed via two modes, i.e. through an online portal or enrolment centre.

While the demographic information can be updated through any of the above two modes, updating biometric data is possible only through the enrolment centre.

Here is the detailed stepwise guide to help you with the UIDAI Aadhar update.

1. Aadhaar Card Correction through the online portal

If you want to change or update the demographic data in your Aadhar such as Aadhaar card mobile number update or address update online, you can log-on to the self-service portal of the UIDAI and follow the steps mentioned below for any Aadhaar card correction online.

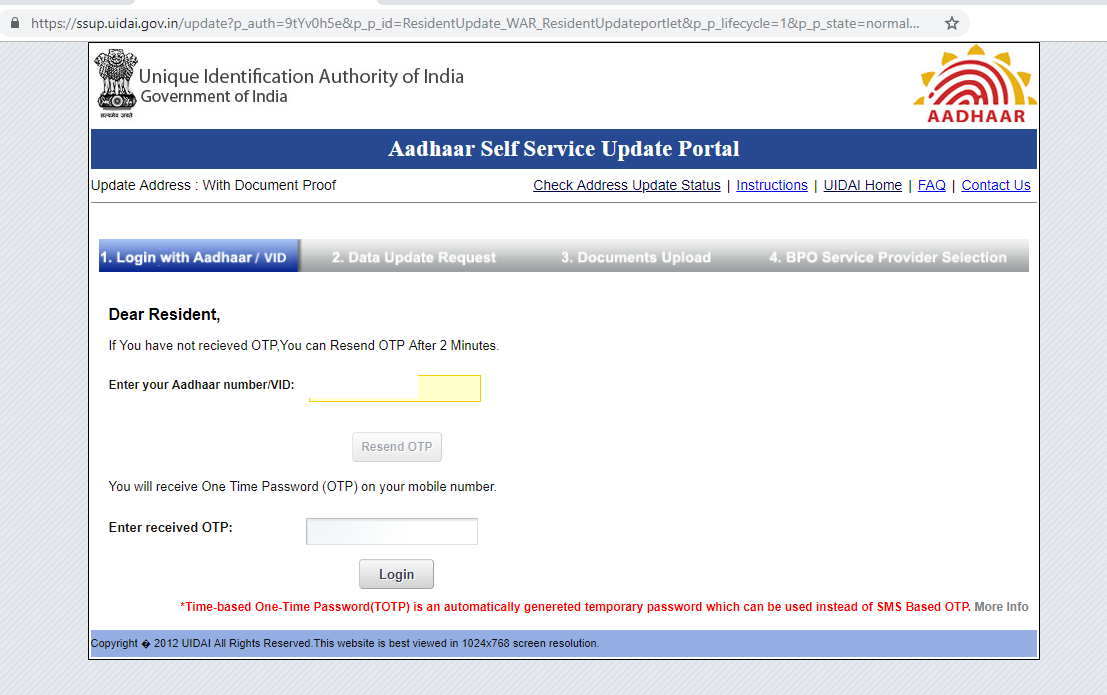
a. Log-on to the official UIDAI website at https://ssup.uidai.gov.in/aadhaar-home/.

Aadhaar Home Page

b. Locate the section titled “Update Your Aadhaar ” and then click on the link “Update your address Online.”

Update aadhaar online

c. On the next page, enter your Aadhaar number and type in the captcha code and click on the button “send OTP”.

You will receive an OTP on your registered mobile number. Type in the OTP when prompted. This will take you to your Aadhaar update portal.

Update aadhaar online

d. Here, you can select the demographic information that you want to update such as name, address, mobile number etc.

e. Now, enter the updated information as updated on the screen. Make sure that you enter the correct and up to date information. Also, check if every other information in your Aadhar data is accurate. If you need to change any information regarding the pin code, district, post office, state etc. you must contact the UIDAI help desk at help@uidai.gov.in.

f. After you are satisfied with the details, click on the “Submit” button. This will generate a URN. Note down the URN at a safe place as it will be required to check the Aadhar card update status later on.

g. You will now be given the option to select a BPO for your request. Select any of the given BPO and click submit.

Now on the next page, you will be asked to upload scanned and self-attested copies of the approved documents as mentioned at  https://resident.uidai.gov.in/Resident-theme/pdf/valid_documents_list.pdf

  1. You can now download the copy of the acknowledgement.
  2. It usually takes a few working days for the information to be updated. You can check the status of your update request using the URN on the portal.
  3. If your request is approved, you will receive your updated Aadhar card through mail at your address. If the request is rejected for any reason, you will need to re-apply for the same.

2. Aadhaar Card Correction through Enrolment Centre

If you do not have access to internet and computer, or need to update your biometric details, you can visit your nearest Aadhar enrolment centre. Steps involved in changing the Aadhaar details through an enrolment centre are:-

Find out the nearest Aadhaar enrolment centre through the UIDAI portal.

Locate aadhaar enrolment center

  1. You are not required to make any prior appointment and can visit the permanent enrolment centre as per your convenience.
  2. Make sure you take the original copies of all your documents that have been mentioned against the respective change of information option. You can access the list of documents at  – https://resident.uidai.gov.in/Resident-theme/pdf/valid_documents_list.pdf
  3. The operator would verify your details and if your documents are in order, and then the operator will proceed with the Aadhaar card correction online.
  4. The operator would enter all the details in the software, take your biometrics (if required) and scan the copies of your documents.
  5. Once the process is completed, you will get an acknowledgement receipt which will have the URN.
  6. You can track the status of the update request against your Aadhaar through the UIDAI portal.
  7. If your documents are in order, you will receive the updated copy of Aadhar at your address in a few working days.

Getting the information in your Aadhaar Card is extremely important otherwise you might lose out on several benefits that you are entitled to. With the help of the online portal as well as a permanent enrolment centre, the process of the Aadhar card update has become conveniently easy. If you also need to get your Aadhaar data updated, you must act soon and complete the process through the appropriate online channels.

Read More »

If your phone’s battery does not run much, then do this setting, it will work

 Everybody now uses smartphones instead of mobile phones. Although smartphones have more features than normal phones, but no solution has yet been found regarding their battery life. Due to multifunction, their battery runs out quickly, which keeps users worried. But there is no need to worry because we are telling you about such settings by which you can save your smartphone battery from running out quickly.

Screen timeout
Setting the screen timeout in the smartphone means that you are not using your handset. Upon making this setting, the handset’s screen automatically locks. If you do this setting in the phone, then your phone battery will not drain quickly. You can select in it yourself that the vocabulary should be turned off after seconds / minutes.

Keep GPS Off
Nowadays GPS is being used more. The location can be detected from this. If you do not use GPS, then you offer it. Due to its continuous on, it costs more than the battery of the phone.

Power saving modes
Now in most of the smartphones, the power saving mode option has started defaulting if your phone does not have the option. However, if your phone does not have this feature, download it from the Google Play Store and keep it on forever.

Original charger

When we go out somewhere, we forget to take our Charger with us, in such a situation, we charge our phone with another Charger, which ends the battery life of our phone very soon. Keep in mind that you should never charge your Smartphone with Duplicate Charger or any other Mobile Charger. Charging Point of the Mobile gets deteriorated when Charging with Duplicate Charger, and the battery soon deteriorates.

Do not use Fast Charger

In today’s time, you will find many such Fast Chargers that will make your Smartphone Full Charge in some time, but users forget that this can ruin the battery of your Smartphone, so as much as possible with such Charger Try to save your Smartphone.

Do not leave Charge at night

Being a person has made it a habit that when he sleeps at night, he leaves the phone on Charging, which keeps the phone charging all night, whereas it is better to charge the Smartphone continuously for at least 2 or 3 hours. It is, if you also leave your phone on the Charge overnight, then change this habit now so that the battery life of your Smartphone can last longer.

Avoid Full Charging

Your Smartphone should not charge 100%, this reduces your battery life, the phone should be charged up to 80% only after which the phone starts heating up and its effect on the battery’s capacity.

Read More »

How to enter your home or shop name address on Google map?

 Do you also want to learn how to enter your home, shop or any famous place on Google Maps. So believe me, this post today is only for you. It is very easy to put your address location on Google Map. Which you will know after reading this post.

Let me tell you that along with putting your name and address on Google Map, you can also add a photo, website and business card of that place. However google verifies the information you entered. Only then the details you enter are added to google map. It takes 24 to 48 hours.

Especially those who do business. They want to reach the name and address of their shop to as many people as possible. In this case, if they add their name and address on google map. So the customer can easily reach their address.

To add your location on Google Map, you just need three things. First Smartphone, second Internet and third gmail id, if you have these three things. So you can enter the name and address of your house or shop in Google Maps.

So, without delay, let us now know that how to put your name and location in Google Map? To put your address location on Google Map, you just have to follow some simple steps mentioned below.

First of all, let us know that wherever you want to add the address on google map. If possible, you should sit in the same place and follow this procedure as mentioned below. Because by doing this, your location on Google map will be a perfect ad. So let’s know how to put location on Google map?

Step 1: First of all you open Google map app in your smartphone and login by entering gmail id, password.

Step 2: Now tap on the menu button in the top left side of the app.

Step 3: Here below you will see the option of Add a missing place, tap on it.

Step 4: In this page you have to fill up and submit the complete details of your address location.

  1. Name: Here you enter the name of your shop or place. Which you want to appear on google map.
  2. Category: Here you select your address category. For example, if you want to add your shop, then you select the shop. The same if you are adding the address of a temple. So select Temple in category. It means to say that you are adding the address of any place. Select the category according to that thing.
  3. Location: Here you select your place. The place you want to appear on Google map. To do this, you turn on your phone’s gps and then click on the button of update location on map. After doing this, your address will come automatically.
  4. Add others details: Now you can click on this button to add your phone number, hours, website, opening date and photos. As soon as you click, options will come in front of you to interconnect them.

Add hours: enter hours here. That is, your shop remains open for how many days a week, from how many hours to how many hours.
Add phone number: Here you enter your phone number so that the customers direct can talk to you.
Add website: If you have a website. So you enter the URL of your website here.
Add opening date: Leave this option as is.
Add photo: Here you can add a photo of your shop or place.

Step 5: When you fill up all the details well. Then you tap on the arrow mark given in the top right side. So that all your details are submitted to Google.

After the details are submitted, Google will verify the information you entered. If you have filled up the correct information. So your address will start showing on google map within 24 to 48 hours.

Note: If you think you have entered the wrong name, place or address. So you can correct it by editing it. To do this, you have to go to the three line menu option again and tap on Your Contribution and go to Edit.

How to know if the location added on Google Map is approved or dis-approved?

The detail you have added on Google Map. To check its status, you can find out by following some of the steps mentioned below.

Step 1: Google has approved or dis-approved your details. To know its status, first of all you open Google Map and go to Menu option.

Step 2: Here you will see the option of your contribution, you select it.

Here you will know that your details (name, address, location) have been added on Google map. It has been approved or dis-approved.

Read More »

Is egg veg or non-veg? Scientists have found the answer

 Method

Often, the question arises in the minds of people whether the egg is a wedge or a non-veg? At the same time, some people believe that it comes in non-veg category because it gives it to chicken. Scientists have found the answer to your question, while there are some people who are not accepting this theory as correct.

So milk would also be vegetarian

Vegetarian people believe that the egg has come from the chicken, so if the chicken is non-veg, then the egg is also non-veg, but let us tell you that science says that milk also comes from the animal, so how did it become vegetarian?

Eggs found in the market are unfertilized

People think that the egg comes out of chick, so it is non-vegetarian whereas all the eggs found in the market are unfertilized. That is, chickens never come out of these eggs. Scientists have also tried to answer this question through science to clear the misconception of this. According to him, the egg is vegetarian.

It turns out that the egg is vegetarian

Eggs have three layers. The first is the yolk on the skin, the second the white and the third egg yolk. Yoke means yellow part. According to a research done on eggs, only egg whites contain protein. No part of the animal is present in it. Therefore technically egg white is a white wedge.

Non-vegetarian happens

Like egg white, egg yolk i.e., yolk also contains a good amount of cholesterol and fat along with protein. The egg comes only after coming into contact with the chicken and the chicken. They contain gamet cells which make it non-vegetarian. Whereas nothing like this happens in marketed eggs.

Then how does a chicken hatch an egg?

The hen starts laying eggs after 6 months. She lays eggs every 1 or one and a half days, but please tell that it is not at all the case that the hen must come in contact with any hen. These eggs are called unfertilized egg. Scientists claim that chickens can never come out of them.

Read More »

What happens to those who die, their Facebook account?

 Any person can be a victim of any untoward at any time. Is it or not? In such a situation, you have thought what will happen to your Facebook? Will he stay like this all his life? Have you ever thought what can you do to the old Facebook account of someone close to whom you have lost with great grief?

Legacy contact

Keeping a ‘legacy contact’ is the best option to maintain your account on Facebook. Your legacy contact can manage your account after your death. They can change your profile picture, post ‘pin’ on your timeline and reply to friend request. However, they are not allowed to post anything or see your messages.

What does Facebook do with the account of dead people?

Facebook memorializes the accounts of the dead. That is, their account is not deleted. Rather, people can save the memories of the dead person, so keeps their posts and photos saved.

In the memorialized account, ‘remembering’ is added in front of the person’s name. That means they are being remembered. If the dead person has kept his timeline open for people’s posts, then people can also post on their timeline.

The memorialized accounts do not appear in ‘People You May Know’ or Friend’s Appearance, nor do people present in their friend list get the notification of their birthday. If the dead person has created a page of which he is the only admin, then the page is deleted as soon as the news of the death is received. the dead person has set a ‘legacy contact’, then he can change the account.

If you want your account deleted after death?. Then go to the option with legacy contact and select ‘Request Account Deletion’.

How to report the death of someone to Facebook?

When you are on a page with a legacy contact, at the end of the page, Facebook asks you if you want to give information about a dead person to Facebook. By clicking on it, you reach a form, which you have to fill before the account owner is declared dead.

But it is not that you make anyone dead. Death certificate of the dying person has to be uploaded. Only after verifying that, Facebook will declare that person dead.

a good thing

Even after your death, Facebook will not share your message with anyone in any way. Neither will you give your login details to anyone. According to the privacy policy of Facebook, this is a crime. And they don’t do that at all.

It is our wish that you live a hundred years and be perfectly healthy. But be aware that if something untoward happens to you or someone close to you, no one can misuse your Facebook.

Read More »

Why are most hotel bed sheets white?

 Ever wondered why bed sheets are white in most hotels? We almost never buy white bed linen for home but it charms us at hotels, right? Talking about this on our visit to Tree House Jaipur, Abhinav and I have been curious to find out. The black and white of it seems obvious: white stands for cleanliness. But is there more to it? We asked people from hospitality industry & here’s what we got:


1. White is bright: Change your bedroom linen to white and notice the difference. White makes everything in the room look more bright. Designs and patterns become more visible against white than any other colour. “White as a colour enhances both natural and artificial light in a room. Since different colours are incorporated in the curtains and upholstery, beds with white linens are placed in the centre of the room to break the colour scheme,” avers Shilpa Kosambia– Executive Housekeeper, Sofitel Mumbai BKC.


2. The Colour Psychology: According to colour psychology, white stands for purity and perfection. Imagine a clean room but with red or blue bed linen. Can you be sure of its cleanliness? Abhinav and I will certainly be suspicious (well, we are paranoiacs anyway!). Other colours can mask dirt, white is pure. There you go. “White symbolizes purity. It is clean and untouched. Also, the sight of a clean bed, to a tired traveller, adds  to the visual appeal,” says Aashu Bhatnagar, Senior Director of Sales at Nidra Hospitality. Agrees kosambia, “White symbolizes purity and also marks new beginnings, hence is the ideal choice of colour for most hotel beds..

3. Maintenance: Geetha Sudesh, Director of Service, Hyderabad Marriott Hotel & Convention Centre and Courtyard by Marriott Hyderabad explains this point in detail. She says, “The quality of linen we use for hotels and the multi-prong step that we use for maintenance is the reason for the crisp white bed sheets at hotels. We use standard 300 thread count bed sheet, a cotton and polyester blend (50:50). The reason hotels use a blend of cotton and polyester is because it combines the best of both fabrics: while cotton is a water-loving fabric and absorbs up to a third of a gallon of water per pound when wet while Polyester is called ‘scavenger fabric’ as it easily picks up and holds on to dyes and soils. The strict process that we as hotels adopt, help maintain our linen in top condition.


4. Replacement: Other colour shades may vary but white is the easiest colour to replace. Well, black too but then black linen wouldn’t be so appeasing, right?

Also read

Read More »

Trick to double mobile sound

 In today’s time, we are all aware of the important role that smartphones play in the life of every human being. And in today’s time, people are taking these smartphones not just for the needs but also as a trend. People are also getting more attracted towards these smartphones because along with the works, they have also become a good means of entertainment.

But with the increasing technology, in today’s time the list of Android Smartphone is at the top today. Due to the great features of Android platform, people are getting attracted to these smartphones. Today you can work in these smartphones and can entertain yourself.

Today with the increasing technology, due to these smart phones, we can listen to music on these and also watch movies and videos. But among all these tasks, the most problem comes from the volume of smartphones.

Smartphones are giving us everything from good screens to good features, but the problem of volumes in these smartphones continues. Many people are worried about the problem related to the volume of the smartphone, so today we have come up with a solution to these problems.

After this method mentioned by us, now no smartphone user needs to worry about the problems related to the volume of the phone, because after the method we are going to tell you today, the volume of the smartphone will increase twice.

So let us tell you in detail about this Volume Increase trick:

  • To increase the volume of your mobile phone, you must first download and install an app from Google’s Play Store. The name of this app is Speaker Boost which you will get for free at playstore. Now when you accept all permissions then you will be able to open the app. After this you will have the option of Boost Control Panel. With the help of this you can increase the volume. But yes, remember that never do full volume in one go or else the speaker can also go. You have to increase it a little bit. Now after this you will get a lot of Warning messages, which you just have to accept by Yes. Speaker Boost Warning Messages You will be able to increase the volume of your phone only when you complete the options for the volume given in this app. But it is also very important to follow the Warning messages that have come in the midst of all this. Its body whenever you can increase the volume of your phone very easily. You can do this through the option of Volume Boost Control Panel. In this way, we can increase the volume of our Smartphone in a very simple way.
Read More »

Friday, December 11, 2020

Use 5 Tricks while uploading photos on Facebook, see more like

 1: Upload Your Photos in High Resolution

By default, your Facebook photos are uploaded in relatively low resolution -- a maximum of 960 x 720 pixels. That’s fine if someone’s viewing your photos on a computer monitor or smartphone screen,


However, if someone wants to download your photos for printing, Facebook’s default resolution simply isn’t good enough. You shot your photos using a multi-megapixel camera; why not have all those pixels available to interested friends and family?


Fortunately, Facebook offers an option to upload your photos in high resolution for a better download experience. Uploading in high resolution – what Facebook dubs the High Quality option – creates a version of your photo up to 2048 x 2048 pixels, considerably more detailed than the default 960 x 720 pixel version.


When you select the High Quality option, Facebook creates two versions of your photo on its servers. There’s the 960 x 720 pixel (max) version for online viewing, and the new 2048 x 2048 pixel (max) version for downloading. Note that uploading in High Quality does not affect the quality of pictures displayed onscreen; the High Quality version is only accessed when someone opts to download your photo.


To upload a higher-resolution version of a photo, check the High Quality option at the bottom of the photo upload page. When you select High Quality for an entire photo album, all photos you upload to that album will be at the higher resolution.


Note that High Quality uploading takes longer than uploading standard-resolution photos; there’s more detail to upload. The extra upload time is worth it, however, if you want your friends to be able to download and print good-looking versions of your photos.


2. Map Your Photos

You may already know that you can add a location to any photo you upload to Facebook. Just click the Add Location icon beneath the picture thumbnail and enter the name of the location into the Where Was This? box; it’s that simple. You can add the location when you first upload the picture, or at any subsequent time by editing the photo.

When you add a location to a photo, it appears on the map that’s displayed when someone selects Places on your Timeline page. The map has pins for each place you’ve either checked into or taken a picture at. Click a pin to see a panel for updates and photos; click the left and right arrow to cycle through all photos at that location.

If you want to add more photos to your map, simply display the map page then click the Add Places button. This displays a reel of your untagged photos. Click a photo and then enter the location where it was taken. It will then automatically be added to your map.


3. Share Different Photo Albums with Different People

Another good reason to organize your Facebook photos into albums is that you can set different privacy levels for each album. That lets you select who can see which photos -- and effectively hide certain types of photos from certain people.

Think of it this way. You may have a ton of photos of your kids or grandkids that your family wants to see but are of little interest to your co-workers or neighbors. You may have photos of your local activities that your neighbors want to see but distant family isn’t interested in. And you may have work-related photos of interest to your colleagues that your family and neighbors would find boring.

The solution is to first create relevant photo albums, and then set the appropriate privacy levels for each album. You do this by clicking the Privacy button on the photo album page and making a selection from the drop-down list.

4. Tag People in Your Photos

Most photos you upload to Facebook have people in them -- friends and family members, in most cases. Facebook lets you tag those people who appear in your photos, so that the photos will also show up in those folks’ Facebook photo pages.

In fact, Facebook uses facial recognition technology to suggest who to tag when you upload a photo. Facebook compares faces in your photos to faces of its users, and suggests those names for you to tag. It doesn’t always get it right, but it’s a place to start.

When you upload a photo to a photo album, Facebook puts a box around each face in the photo. Click the face or box to display the tagging box, then enter the name of that person into the box. If that person is one of your Facebook friends, you’ll see a list of matching names as you type; select a name from this list to tag that person.


5. Share a Friend’s Photo On Your Own Timeline

Sometimes a friend or family member might post a photo that your Facebook friends could be interested in. Fortunately, Facebook lets you share your friends’ photos on your own Timeline, and in your own News feed, so your friends can view them, too.

If the photo you want to share is in a friend’s status update, click the Share link beneath the photo. To share a photo that a friend has uploaded to a photo album, open the album and click the photo to display it in a lightbox, then click Share.

This opens the Share This Photo dialog box. Make sure On Your Own Timeline is selected, then enter a text message to accompany the photo. Click the Privacy button to determine who can view this post, then click the Share Photo button. Voila! The photo is now posted to your Timeline and News feed.

Read More »

How to Remove Any Virus from an Android Phone in 4 Steps

 This week, Google removed the popular CamScanner PDF creator app, which has been downloaded more than one million times, from the Google Play store because the app recently started delivering malware. Unfortunately, when it comes to mobile malware, Android phones have the dubious distinction of attracting more than their fair share, and that malware can range anywhere from annoying popup ad delivery services to sophisticated mobile spyware that allows a hacker to spy on your every action. So if you think you have a virus on your phone (see the 5 Signs below), you definitely want to take these steps to remove it. 


1. Uninstall any suspicious apps

Spotting an app you don’t remember downloading can be a red flag. And other apps, especially free apps from small developers, may contain adware. So if you see apps you don't need, uninstall them, just to be safe.


To uninstall apps, head into Settings > Apps and Notifications > All Apps then click on the app in question. This should bring up its dedicated screen with an uninstall button, which might be enough to remove the malware. However, if the uninstall button is greyed out, the app may have gained admin access, making it trickier to remove.


In this case, head to Settings > Security & location > Advanced > Device admin apps, and check if any apps are in that list that shouldn’t have such deep access. If so, you can tap on the app to deactivate it, which should allow you to uninstall it from the Apps & notifications menu.


2. Run an antivirus scan

The most certain means of confirming malware on a device is to run an antivirus scan. Mobile antivirus can automatically scan downloads and warn about apps that might leak personal information, allow pop-up ads on your device, or drain your phone battery.


Major security software providers such as Kaspersky, Avast, Norton and AVG also have Android apps, some of which are paid-for, but all offer a free option. There are also well-regarded mobile-only providers, such as Lookout Security. Whatever you do, don't just download some random security app from Google Play, many of these apps do nothing and some can even create security issues of their own. 


Head into your antivirus app and select a scan, which should then flag the exact apps that are presenting a threat to your device. You may be able to remove the malware directly from the app, or you may need to manually uninstall it from Settings > Apps & notifications. If the first scan doesn't find anything, you may want to download a second antimalware app, since we have found that security programs can vary in which virus apps they detect.


(It’s worth noting that antivirus apps can also eat up a lot of phone battery, especially if you enable a continuous scan feature.)


3. Factory reset the phone


If uninstalling the suspicious app(s) doesn’t stop your phone from popping up annoying messages or worse, you may need to take the nuclear option of performing a factory reset, which will clear your phone of all data.Make sure you have your photos and media backed up, and any messages you may want to save, then head to Settings > System > Advanced > Reset options > Erase all data.

4. Stop the malware from being re-installed

Once your phone is clear of malware, it’s a good idea to be wary of what you download and where you download from. Always download apps from Google Play or other trusted sources and only download apps you really need and know are safe – even then, keep a sharp eye on whether you’re really downloading that popular game you keep reading about, or only a clever fake.

Signs your Android phone is infected with malware
While your phone may display clear symptoms of a malware infection, often, malicious apps lay dormant on the phone. Instead, the damage shows up as a charge on your bank card or a phone bill with unusually high data charges.

“Everyday users don't usually discover something's wrong until it’s too late, as it’s difficult to detect malware with a non-armed eye, especially in the case of sophisticated malware that might, for instance, hide SMS notifications or work only when the device is charging [so that the user doesn’t notice],” says Alexey Firsh, malware analyst at Kaspersky Lab.

That said, many forms of less sophisticated malware will produce symptoms in an infected phone. 

Decreased battery life. If you’ve inadvertently downloaded a cryptocurrency miner, it’s likely your phone’s battery life will drop far quicker than normal, Firsh says. Though there can be many other causes of Android battery drain.

Phone functions more slowly. Malware that is constantly sending information back to a mothership may hog your phone’s processing power, resulting in its general performance slowing down.

Higher data usage. Similarly, information-stealing apps as well as data miners can use up a lot of data – so check your settings to see how your monthly allowance is doing. Other malware that might reveal themselves in bandwidth usage include apps that secretly harness your device for use in distributed denial of service (DDOS) attacks to freeze other sites, Firsh notes.

Suspicious notifications from banks and unknown services. If banking malware steals your details, it might result in your bank – or another financial institution – notifying you of charges or even new accounts opened in your name. SMS malware might also reveal itself in premium text services sending you notifications of the fees you’ve just paid.

Pop up ads. Seeing a lot of pop-ups while you browse the mobile web? You may have been infected with adware. “Popups can mean that malware has installed itself within the OS and has a trigger for a popup based on common ways that users would operate their phones,” Galindo says. The idea is to engage users when they’re most likely to click on an ad or offer, thereby downloading another bit of malware that has the potential to cause greater damage to their device or data.

Read More »

Thursday, December 10, 2020

[FINAL] New BPL List 2020: BPL Ration Card List Download & Check Your Name [State Wise SECC 2011]

BPL List 2020 Download & Check Your Name

Summary: The BPL list is the list that contains the names of the citizens of the country falling below the poverty line, and the APL list contains the names of the citizens who are above the poverty line.

In India, a census is done every 10 years, in which all information about all the citizens of the country is collected, what is their education, what is their occupation and income etc. Finally, based on that, the BPL and APL list is made.

Here is how you will check BPL List 2020 [BPL List 2020] . There are different types of ration cards in India. One of them comes from BPL card holders who fall below the poor line.

All Candidates who are willing to apply online application then download official notification and read all eligibility criteria and application process carefully. We will provide short information about “BPL List 2020” like Article Benefit, Eligibility Criteria, Key Features of Article, Application Status, Application process and more.

BPL List 2020 – Overview
Name of ArticleBPL List (BPL Ration Card List)
in Languageबीपीएल सूची
Launched byState Government of India
BeneficiariesPoor People of all States
Major BenefitView ration card in online mode
Article ObjectiveSee the ration card details sitting at home
Article underState Government
Name of StateAll India
Post CategoryArticle/ Yojana
Official Websitehttps://mnregaweb2.nic.in/
Important Links
EventLinks
Finad New BPL ListClick Here
BPL List 2020Official Website

Online New BPL List Objective

Earlier, the people of BPL card holders used to visit the government office, so that they had to face a lot of problems. But now you can check your name in the list online from home by the central government. The MNREGA website is for citizens of all states of the country. This will also save your time.

How to check name online in BPL list under MGNREGA scheme

Step to Check Online BPL List based on MGNREGA scheme 2020

Step 1- Visit the Official Website Mahatma Gandhi National Rural Employment Guarantee Act (MGNREGA) : BPL List i.e. https://mnregaweb2.nic.in/.

Step 2- On Webpage, select the required option as per your information.

Step 3- Select your state, district, block and panchayat. 

Step 4- Click on Submit button, the complete BPL list with name, gender, age, category, father’s name, total members, deprived codes and other details shown on the screen.

Step 5- Find your name in the BPL list displayed on the screen.

Step 6- Finally, Take a print out for future use.

BPL List (Till 2020-2021) Based on (SECC-2011) NREGA Data

Step to Check Online BPL List Based On Inclusion & Exclusion in NREGA Scheme

Step 1: To download the BPL List from SECC 2011 Data, candidates can directly click this link – https://nrega.nic.in/.

Step 2: To check your name in the IPPE2 final BPL list, candidates can click the “State Name” to reach to the next page which will be displayed as below.

Step 3: On this screen, users have to select the financial year (Up to 2020-2021), district, block, panchayat and then click on the “Proceed”button. which will take you to the list of NREGA job cards (Almost all of those belongs to the BPL families).

Step 4: On the next page, you will see the complete list of all NREGA Job Cards or the BPL candidates as shown below.

Step 5: Finally, candidates can click the “Job Card Number / जॉब कार्ड संख्या” to check the complete details of that particular candidate.

MGNREGA Convergent Planning List

Step 1: http://mnregaweb4.nic.in/netnrega/Convergent_Planning.aspx

Step 2: The MGNREGA Convergent Planning List will appear as shown below:-

Step 3: Here candidates can select the State, District, Tehsil / Taluk, Gram Panchayat and click at “Submit” button to open the MGNREGA Convergent Planning Households List as shown below:-

Step 4: This list would contain the SECC TIN Number, district, tehsil / taluk, block, gram panchayat, village name, household size, age, gender, social category and job card details.

Major Benefits

Beneficiary Benefits

  • [In BPL list] Below poverty line get ration in subsidy rate and depot, which includes wheat, rice, pulses and oil etc.
  • If your name in BPL list, get various benefit of government and other facilities.
  • BPL Card Holder’s children can get scholarships, and also get employment.

Key Features of Article

Article Feature

  • BPL list issued by the Food and Civil Supplies Department can check there ration card details.
  • Your name will be included in the ration card list in case the information entered in the ration card application form submitted is found correct.
  • All the families whose names will appear in the BPL List will be able to get ration at a reasonable price from the government fair price shop.

State Wise BPL List Download – Find Your Name in BPL List

SECC Data 2011 is available for all the 35 states and UTs and can be checked through the respective state/UT department website’s links given below. All the candidates can find their name in the Gram Panchayat Wise BPL Suchi 2011:-

Name of StateTotal HouseholdsLink
BPL List for 28 States
Andhra Pradesh1,22,70,164View List
Arunachal Pradesh2,60,217View List
Assam64,27,614View List
Bihar2,00,74,242View List
Chhattisgarh57,14,798View List
Goa3,02,950View List
Gujarat1,16,29,409View List
Haryana46,30,959View List
Himachal Pradesh14,27,365View List
Jammu and Kashmir20,94,081View List
Jharkhand60,41,931View List
Karnataka1,31,39,063View List
Kerala76,98,556View List
Madhya Pradesh1,47,23,864View List
Maharashtra2,29,62,600View List
Manipur5,78,939View List
Meghalaya5,54,131View List
Mizoram2,26,147View List
Nagaland3,79,164View List
Odisha99,42,101View List
Punjab50,32,199View List
Rajasthan1,31,36,591View List
Sikkim1,20,014View List
Tamil Nadu1,75,21,956View List
Tripura8,75,621View List
Uttarakhand19,68,773View List
Uttar Pradesh3,24,75,784View List
West Bengal2,03,67,144View List
Union Territories BPL List
Andaman & Nicobar Islands92,717View List
Chandigarh2,14,233View List
Dadra & Nagar Haveli66,571View List
Daman & Diu44,968View List
National Capital Territory of Delhi33,91,313View List
Lakshadweep10,929View List
Puducherry2,79,857NA

Telangana is a new state which got separated from Andhra Pradesh after FY 2011, so BPL List of Telangana People is not present separately. People of Telangana state can check their name by selecting their district in the Andhra Pradesh BPL List.

Check name in BPL list list 2020 from Mobile app?

  • First, you have to go to the Google Play store in your Android Phone.
  • After this, you will have to search by the BPL Ration Card List App in its search bar.
  • After that you have to click on the install option.
  • After this your app will be downloaded.
  • After downloading the app, you will have to open it and a link to the checklist will appear there.
  • you will have to click on that link.
  • Now, you will have been asked some information like name of state, district etc.
  • You fill all the correct information in the form and click on the submit button.
  • After this, you will find a list of BPL holders in your phone.
Read More »